I have a design wall already.. It's a piece of blue felt thumb tacked to the wall. It's probably a 4' square. It's great as long as you only need to put up something small - like a wall hanging or a small baby blanket... but as soon as you sew a row together, the fabric is too heavy and it just falls off the felt.
What's a quilter to do? Well. Go to the local building supply store which was in my case Lowes. I picked up two 4'x8' foamy insulation boards and shoved them in the minivan. That was interesting all on its own. In hindsight maybe getting them cut in half would have been brighter but I wanted them as big as I could get.... There will be a few different kinds of foamy insulation. I picked the one that didn't have stuff written all over it on both sides. Most of the ones I saw were like that. There's also a kind of spongy one that was a blue color and I was concerned that the color would show through. I wanted white so I went with the styrofoam ones. I read online from several people that made design walls years ago using the styrofoam kind and it's holding up nicely.
Then I searched store after store, hopelessly looking for a white or cream king sized flannel sheet to cover these babies with. No. Not wasn't going to happen. I really didn't want to use batting. I have read online that it just doesn't hold up nicely. I wanted my design wall to last as long as I could. A quilt shop I took a class from had batting on the walls and it was all saggy and whatnot. I'm not saying that my felt one won't sag years down the road but hey, what I ended up with was cheaper and prettier than batting.
So back to the story.....
I then Joanns & Hancock's since both had their felt on sale. Joann's was out of white and the stuff at Hancock's looked thinner so I waited... I'm so glad I did! Yesterday after a horrible sewing day (don't ask. Everything I touched might as well just shrivelled up and died), I went to Joann's to see if they had anything on sale that I might not be able to live without. I had a 20% off your entire order coupon burning a hole in my email. So the felt was still on sale 40% off so it was $2.99 a yard and take off that 20% as well... yeah, I left feeling much better.
Here is how we built my new design wall.....
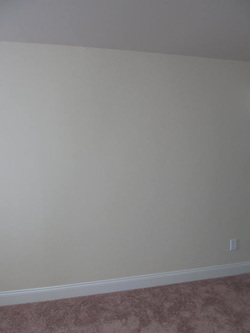
Step 1... Pick out your craft room real estate. I chose the wall that used to have my midarm Bailey quilt machine... but I sold that and am now looking for something to replace it with - probably something site down and less of a real estate hog. Craft room floor space is a commodity you know...
Step 2. Cut your insulation boards to fit. We had to cut off about 5" to clear the floorboards. I don't have a picture of that. Close your eyes and picture hubby and his father taking a utility knife to it. Yeah. Nothing photo worthy.
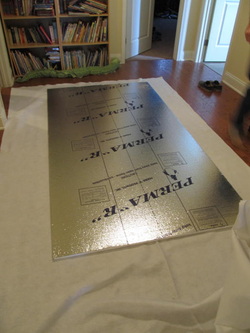
Step 3. Lay your insulation board on top of your fabric whether it be felt or flannel. I'm using white craft felt by the yard. I'm allergic to wool so the real stuff is just not going to be hanging in my craft room.
Leave about 3-4" all the way around. Cut off the excess and save to use as batting when making smaller wall hangings.
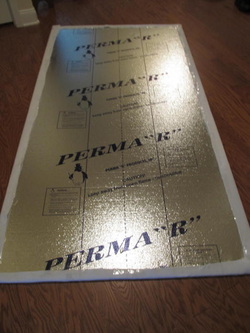
Step 4. Fold over the edges and tape all the way around. I'm being sneaky. I'm using clear packing tape. Why? Because that's what we had.
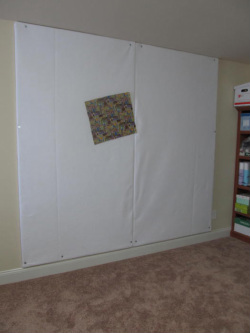
Step 5. Attach to the wall. Hubby and hubby's father tried to use 2" screws. Sadly it was not a good experience. The screws just wanted to twist the felt and it just wasn't working so on our way back from having lunch out, we dropped by Walmart to pick up longer nails and more washers... After we came back, I started making chocolate cake and they got to work on the design wall. They put a nail with a washer on it and hammered it in to the wall.
I still have to smooth out some of the felt and push it between the two pieces. Hindsight... I should have been watching what they were doing. They didn't make sure the felt was nice and smooth but it won't take me long to fix it up :)
So there it is. My design wall. with a fat quarter splatted on it to show it off a bit. Now when I have longer rows of blocks sewn together, I can use pins to hold them up.... and it's bigger than my old blue one - which I still have. I think I'll keep it. It's mostly behind the door so that real estate isn't really in a prime location....
 RSS Feed
